First, I have to remind you of where we started... 4 years ago we got a hankering to redo our "retro" brown bathroom downstairs.
I know, I know... why would you ever want to remove a brown shell sink from anywhere?!?!?!
I suppose this is just like white vs wood trim and we can all agree to disagree. :)
There's not much more to say about the rest of the basement, these pics where taken after we'd already replaced the carpet and started on the bathroom, but you get the feel... dark & brown.
Oooo, good guess! Our house was built in the 70's!!
Now for the real purpose of this post - all the AFTER pics!
I'm not completely done down here... is anyone ever "done" with their home improvements?
But it was clean... so now's the time to take photos and show it off, haha!
We painted the paneling Honeymilk (color matched by Sherwin Williams)
and the top walls are Wood Smoke by Glidden (also color matched by SW)
Both the couches are from Martin's Home furniture, the coffee table is from Pottery Barn
& the rug is from target.
Kevin replaced all the interior doors and trim (baseboards, windows, doors and crown molding) and we put new oil rubbed bronze hardware on as well.
Kevin also updated all the light switches and electrical outlets.
I painted the door to the garage with chalk paint and "chalked" my first artwork,
largely inspired by
this chalk design found via pinterest.
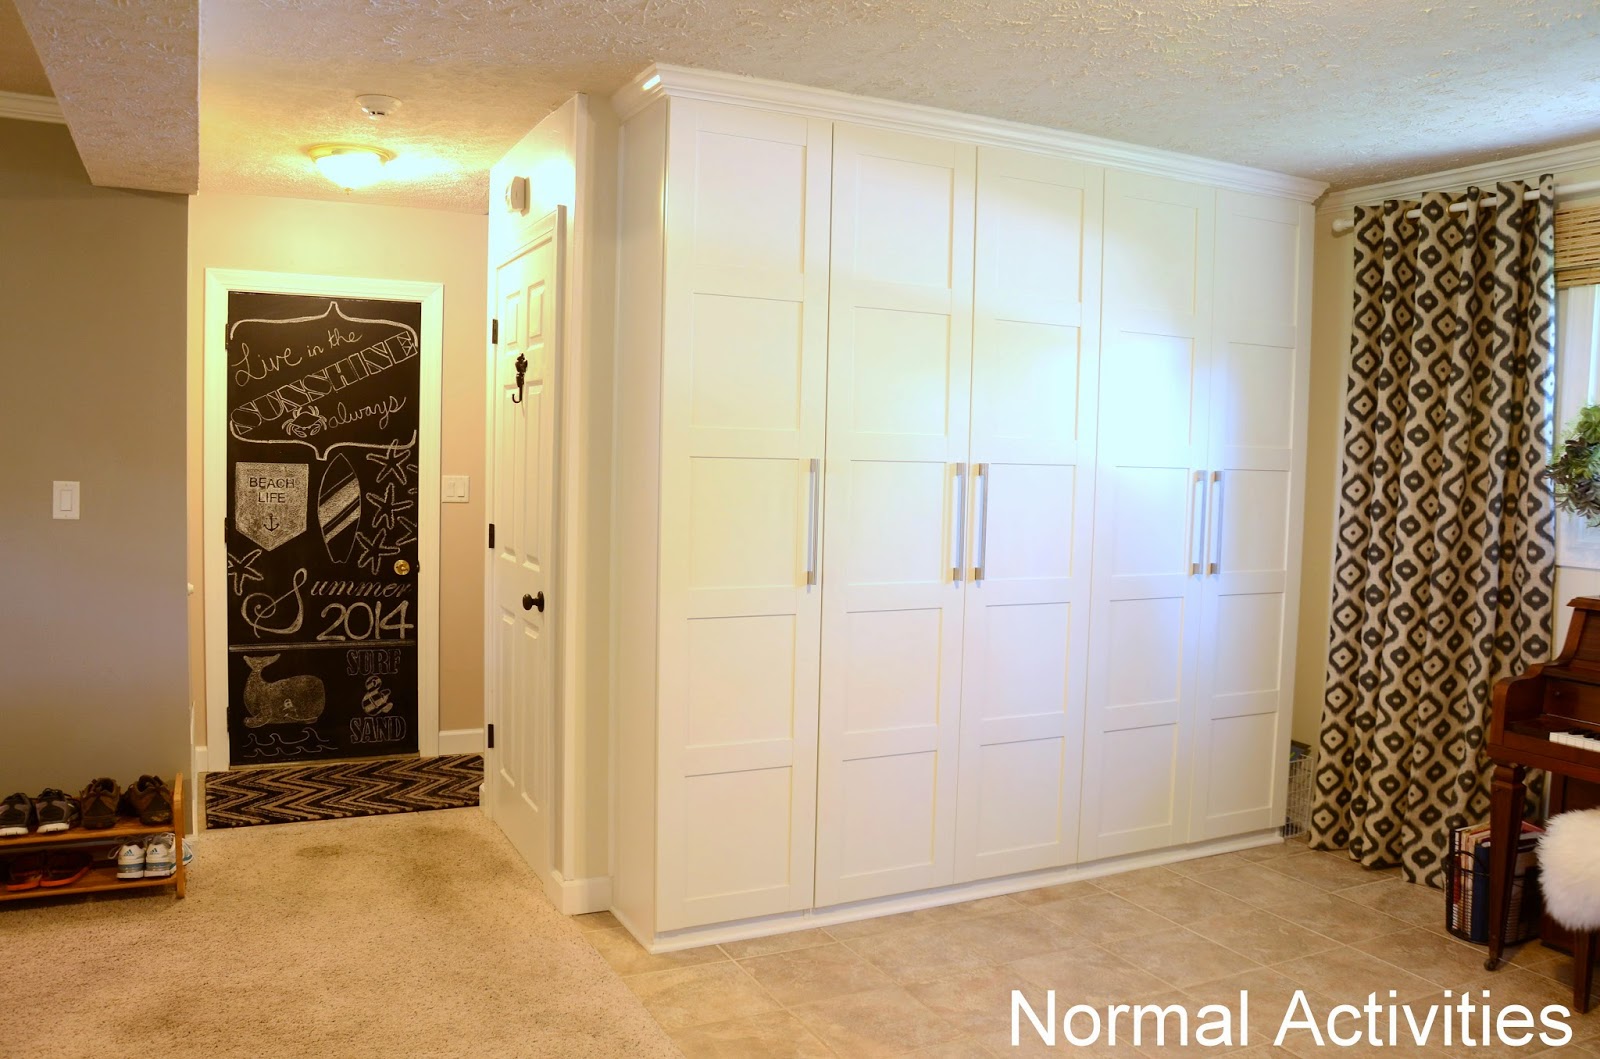
The other side of the basement got some great storage thanks to IKEA wardrobes that we "built in".
It's a very functional area with our large work desk and piano as well.
I just love this easy storage access!!!
The new windows were done by Feldco, the burlap curtains are from Hancok Fabircs
Kevin also installed some a great molding solution to hide all our wires! I love love how this looks so seamless and no ugly orange/blank/yellow... cords and wires are visible!!!
(See in the below pic it's right up under the shelf and looks like molding!)
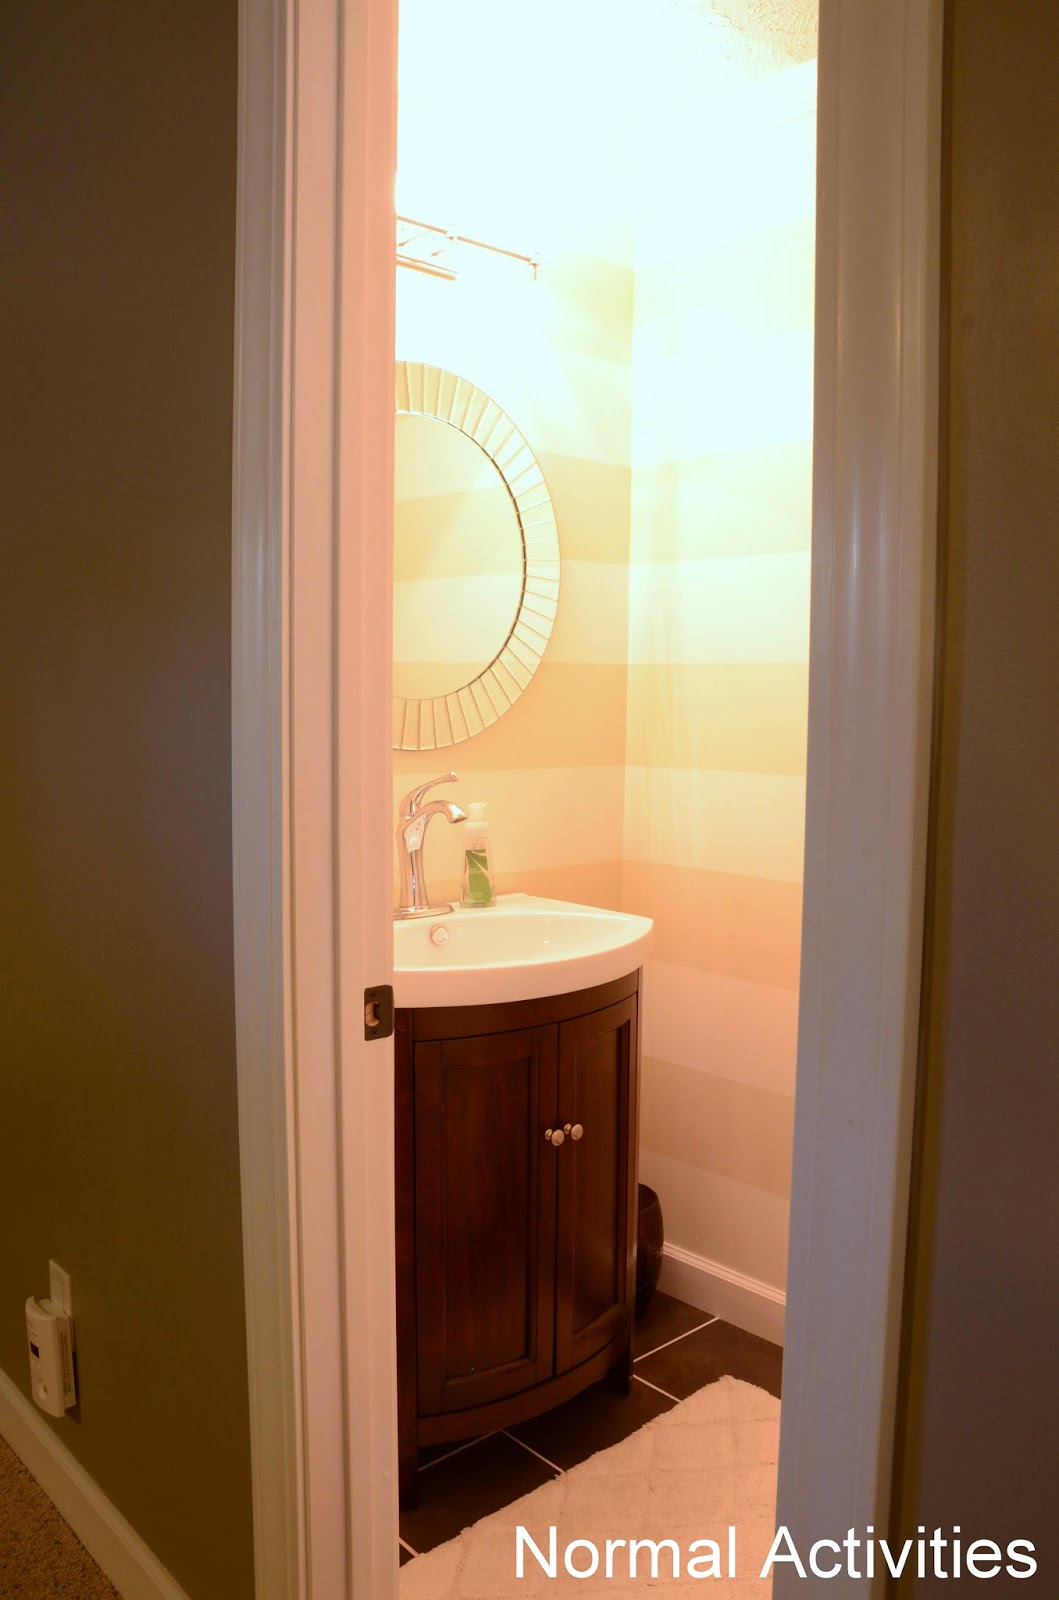
I haven't forgotten about the bathroom that started this whole DIY remodel process!!
The stripes were painted Wishes & Honeymilk just like YHL's first house's
bathroom.
Per usual, I did the painting & caulking and Kevin did all the outlets, flooring, trim, plumbing...
I love the texture the baskets storage on the wall gives the room to contrast with all the sophisticated finishes!
Here are some of the pretty little details
Here are a few side-by-sides to recap the big changes
I think we're pretty happy with all the changes, we spend waaaaay more time down on this level now!
It's functional and bright and there are so many details that I love!